Thursday, March 24, 2011

American Girl Club - Rebecca - Week 5

For Rebecca week 5 we visited CONEY ISLAND!  This was a SUPER fun night of American Girl Club!


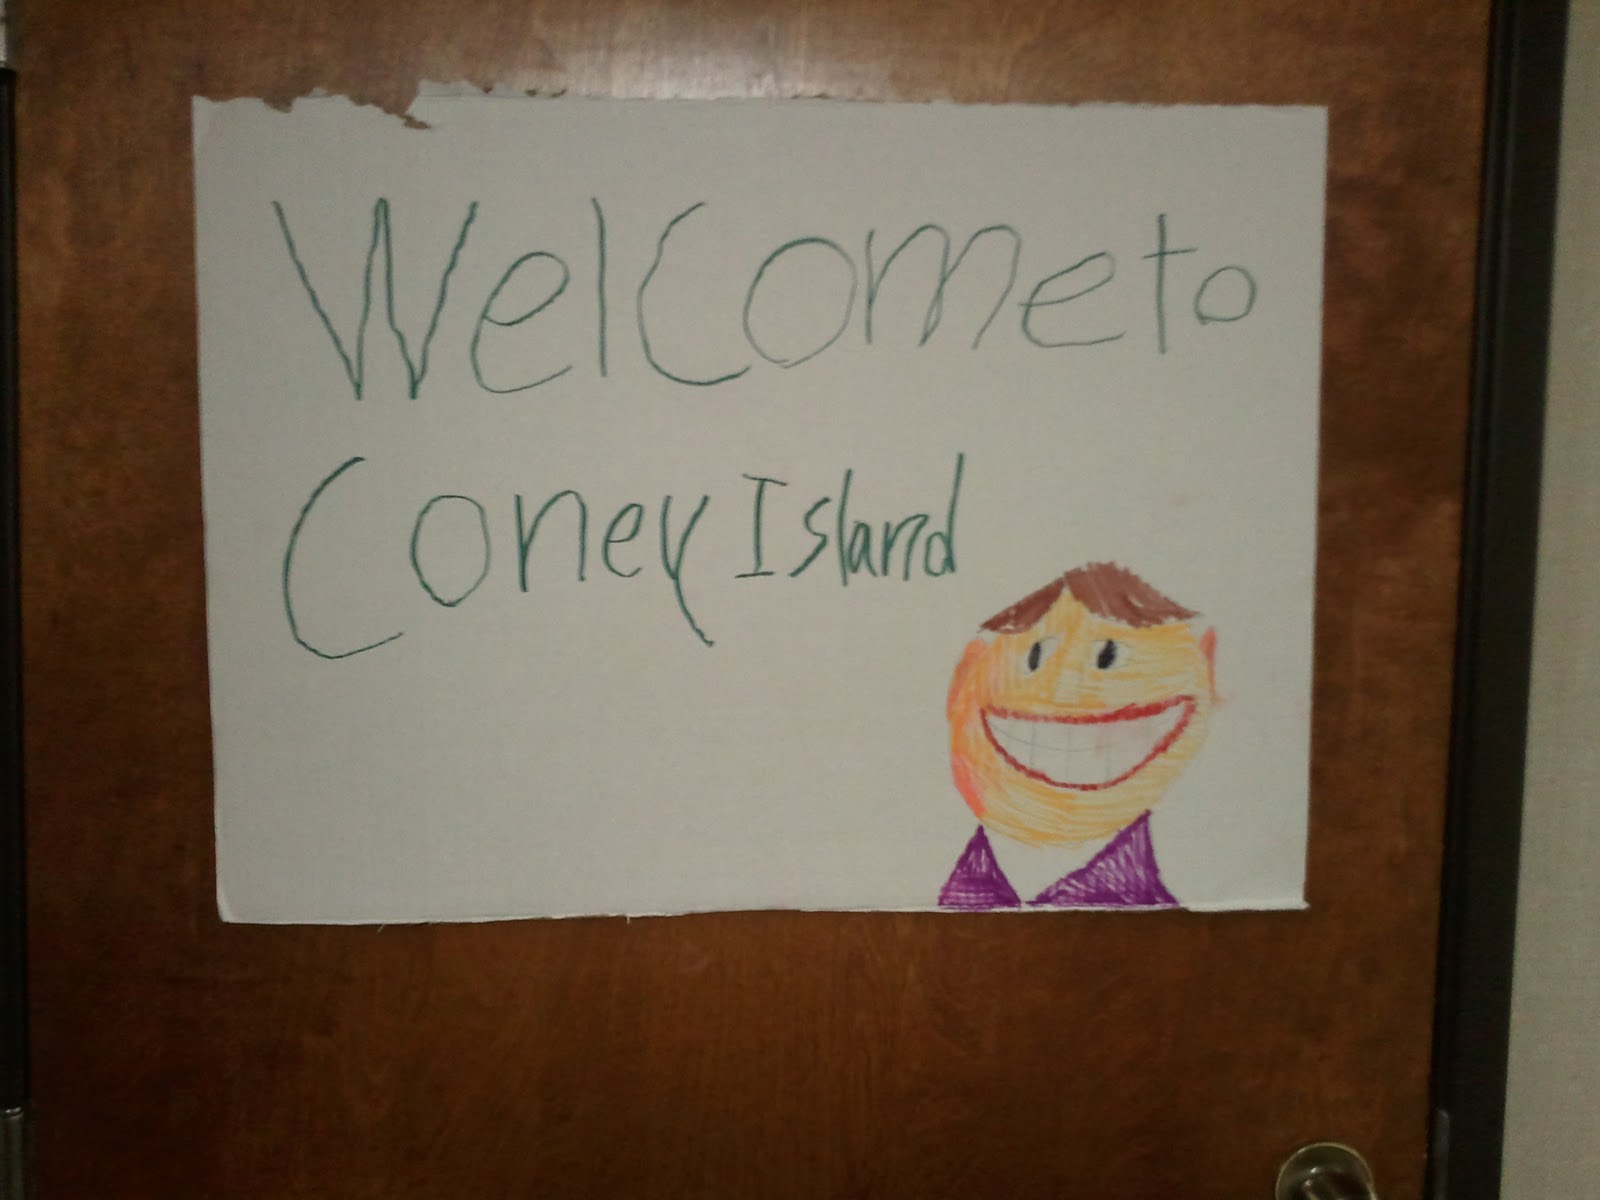
This sign my daughter made greeted the girls as they arrived.  My daughter and I got to club early and decorated the whole building.  We had games set up in every room.  I bought tickets at the Dollar Tree and each girl got enough tickets to play each game 3 times.  I also had prizes for them.  The prizes were candy, crazy bandz, stickers, pencils and shells.

Here are the girls playing a few of the games:


 We also had all kinds of  food that they would have eaten at Coney Island in Rebecca's time! Root beer, apple pie, baked beans, coney dogs, lemonade and cracker jacks! 

I brought some books from the Library with pictures of Coney Island back in it's prime that I showed to the girls. We also had a craft table where the girls could make a paper fan like Rebecca had in the story.


It was really nice to have a FUN night after a couple more serious weeks learning about Passover and Chanukah.

Happy Homeschooling,

Jamin

Tuesday, March 22, 2011

Learning To Sew

My daughter has been sewing with me pretty much her entire life.  (She is 10 now!) She is a natural at sewing.  The thing that has probably held her back most over the years is my lack of time to sit with her on a regular basis and sew.  So this school year we are working on that!  We have a designated time that we sew each week!  She has come a looong way this year fast!

Here are her 3 latest projects:

Shabby Chic Quilt

Owl Pillow
You can download the free pattern for this here: http://www.makeit-loveit.com/2010/12/snuggly-owl-for-sewing-republic.html


New Dress


I think you can get a pretty good idea from her projects what here favorite colors and patterns are!  LOL  Sewing with her is a lot of fun!  I am so glad we have been able to do it weekly.

Happy Homeschooling,

Jamin

Monday, March 21, 2011

Baby Sock Corsages


These have nothing to do with homeschooling or my kids, but I have been making a lot of them lately! Basic directions are HERE

:^)

Thursday, March 17, 2011

Our Mission

I mentioned when I posted about our Eat Your Way Around the USA table that I would post later about how we made our mission. The kids REALLY, REALLY had a good time making this!  I would say this is up there in their top 5 school projects we have ever done.  I honestly had NO idea how to make one of these.  First I spent a lot of time Googling and looking for directions, but I didn't find much that was helpful.  I found a lot of places that were willing to sell me instructions.  But, I didn't want to buy instructions not knowing that I was getting.  Next I went to the craft store and found this:


This said it included "Easy Instructions" but the instructions were just general instructions on how to build something.  Not what we specifically wanted to build.  (Even though they had a handy dandy picture of a mission right on the box!  LOL) If I had to do it again I wouldn't buy the kit.  I paid $10.00 for it and all we used from the kit was 2 pieces of foam board, a piece of card stock, a pieces of corrugated paper and a transparency sheet. The 2 pieces of foam board wasn't nearly enough to make our structure.  So I got a poster board size of foam board at Dollar Tree...for a dollar!  LOL  So yeah, we didn't need the kit! (But we still have other materials left in the box for another project. You can see what was included in the kit HERE.)

Finally what we did was look online for the basic floor plans of some missions.  I have been to most of them.  But, for some reason the one I remember best is the San Juan Capistrano one.  So we loosely based ours on that one with adjustments being restricted by that fact that we were building ours on a pizza box!

The fist thing we did was dig 2 pizza boxes out of the recycling in the garage.  One we spray painted green.  The other we used a Sharpie to plan out our design.  We really wanted to show how the mission was very much like a fort with the living spaces in the walls.  So we based our design on that.  We also found a drawing of the center courtyard and did our best to reproduce the San Juan Capistrano courtyard. 

Once the kids had it all drawn out I cut all the parts out of the foam board.  This required using a Exacto knife, so there was no way for the kids to do this part safely.  After I cut it out and hot glued the main church building together the REAL fun began! STUCCO!  LOL  To stucco the building I bought a tub of pink DAP spackle compound. They spread it on THICK!  The way this stuff works in that if goes on pink and then when it's dry it turns white.  It took our mission THREE DAYS to turn white!  LOL

Once the walls FINALLY dried I hot glued them to the pizza box we had already spray painted green.  Then we used the piece of card stock folded over to make a roof for the church.  For the red tiles we used about 10 of the free red paint chips you can get at Home Depot.  (I figure we spend thousands a year there so we can take 10 paint chips to use for a roof, ;^)  To make the paint chips look like tiles my daughter cut them with a pair of my scrapbook scissors to make the rounded edges.  Then she glued them on is rows.  We used several different shades of red because the tiles on the roofs are hand made and very irregular.  (And I didn't want to wipe out all of one color in the color chips.) She also drew a cross with color Sharpies to make a stain glass window for the front of the church. For the buildings around the edges we made a flat roof using the corrugated paper.

My daughter and I also made the fountain in the middle using foam core and rocks.  We cut several circles of foam core and stacked them to get the height we wanted.  Then we used blue fun foam for the top layer to look like water and glues rocks around the edges to make the fountain structure. For the second level we used a 2 liter bottle lid filled with foam core and fun foam. Then my daughter made a small cross from yellow fun foam and we put a stone on top to hold it. I love how the fountain turned out!

My little man helped with all the landscaping.  He selected and laid out the rocks for the walkway.  Painted flowers on the little bushes and decided where all the plant material should be located.  He also designed the gate with craft sticks and then I glued it together with hot glue.

The last step was my daughter making a sign for the front of the pizza box out of Fun Foam.

Everything except the kit and the spackle compound was bought at Dollar Tree.  I looked for plant material that could be cut down to size. I bought 1 bag of rocks and a sheet of moss.  Besides those items everything else was improvised with things we had on hand. 

It really, really looked great! The kids were SO proud of it and had a lot of fun showing it to their friends.

Happy Homeschooling,

Jamin

P.S.

If you want to see a bigger overhead pic of our mission click HERE.

For project ideas using the kit we bought click HERE.
Wednesday, March 16, 2011

American Girl Club - Molly - Week 5

Well, I am really, really behind on AG posts.  But, since I am back to blogging I am just going to pick up where I am now and worry about the 6 missing weeks later.

Book 5 is about Molly going to Summer Camp.  So we had a camp night!

We started out playing Capture the Flag (Like they did in the book.) This night was different for us than most because we had 5 BOYS at AG Club.  We do have a "no boys" rule.  But, it just happened that 5 boys were there doing the parent swticheroo and since we were outside playing they stayed.  Now we have 5 boys that want to join AG Club!  LOL  One little boy asked his mom if boys could join American Girl Club.  When she tole him "No" he said "Well, that isn't very nice!"  LOL

Anyway here is one of the mom's explaining the game to the kids.
Here are the rules we used.  The kids LOVED this!  They ran for about an hours straight and each team won twice.

After wearing them out we brought them in and had ice cream cones.  (Just like in the book.)  Then we discussed the book and made situpons.

I actually remember making these many moons ago when I was a girl scout! HERE are the in instructions on the correct way to make one. However, you know me, I had my own method!  LOL  I was worried that the yarn would just pull through the table cloth fabric we were using.  In the Molly book they used oil cloth, which is a lot thicker.  So we used something they would have had during WWII  DUCT TAPE! It made the craft very easy and very durable.  They girls had a lot of fun making them.

Here they are working on them.


And my daughter working on hers.

(And there are those annoying stripes again!  This time it was dark outside.  So apparently it's NOT the mini blinds!)

Anyway, it was another great night of AG Club!  We only have 6 night left and we will have covered all the girls!  1764 to 1974!  WOW!  We have been doing this once a week for 3 years now...and I have enjoyed every minute of it!

Happy Homeschooling,

Jamin

P.S. BTW, several people have emailed and asked me about fixing dead links and pictures on my old homeschoolblogger blog.  Just to let you know....we are working on fixing everything and moving it over here.  But, I have over 1600 posts that need to be fixed and moved.  So it's going to take time.  So your patience is appreciated.  :^)

Monday, March 14, 2011

Eat Your Way Around the USA!

Our homeschool group hosted a fun event last week.  It was called Eat Your Way Around the USA.  The way it worked was that each family signed up to host a table on a different State.  At each table there was information about that State, a bite size snack of food from the State and the kids got a stamp in their passport from each State.  IT WAS A BLAST!

My family hosted the California table. 

I wanted to do California because:

A) All the kids were born there.
B) We did a year on CA when my oldest was in 4th grade and so I have LOTS of stuff!
C) WE LOVE CALIFORNIA!!!!

I decided that since there is SO much history in CA we needed to put aside our regular schoolwork and focus on this for 6 week.  So here is what we presented.

This is an overview of our table.  (Sorry about the lines. Apparently the miniblinds were messing with my camera.) On the board we had a section on the Gold Rush and Industry, Tourism and LOTS of pictures of our family at famous places in CA.  We also had a timeline, info on the State flower, insect, etc and a little report my daughter wrote called Why I Love California!

Here is what was on the table...

This is the salt dough map the kids made.  It was very FUN!  If you look close you can see we have pink and blue beads on Sacramento, where the littles were born.  And a blue bead on LA where my oldest was born.

The food we shared was raisins.  We learned that all commercial raisins eaten in the USA and 1/2 around the world come from CA!

The star of our table was the mission the kids and I made.  I will probably do a whole post just about making this later.  :^)

This section was on westward expansion.  We built the covered wagon from a kit. 


This area was about the food grown in CA and things invented in CA.  There are a lot more things that were invented there than this.  We displayed:  jeans, a computer mouse, sour dough bread, a Barbie, a Frisbee, a hula hoop and a fortune cookie!In the notebook we had a coloring book I found about the A to Z of food grown in CA. 

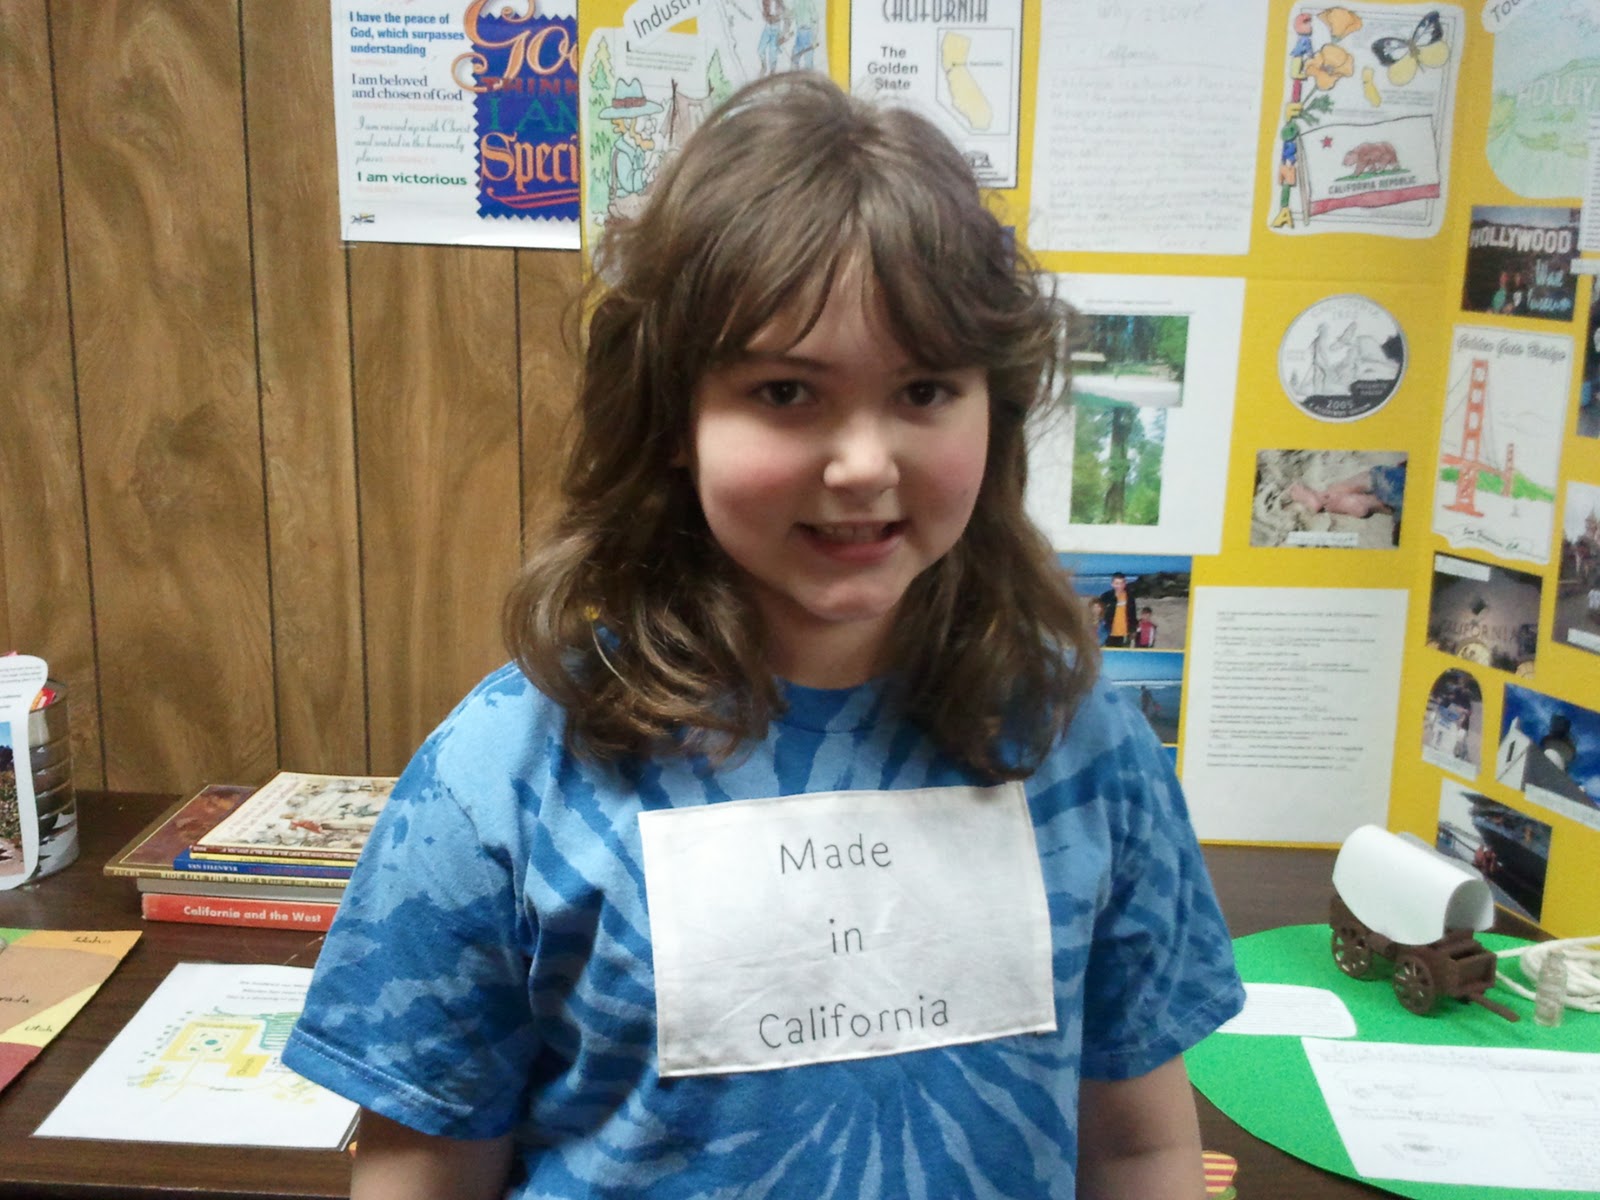
Last, but not least, here is my sweet daughter sporting the "Made In California" tie-dye t-shirt I made her!  I just couldn't resist!  LOL

So that was it.  We had a total of 20 States represented.  Everyone did such a great job with their displays.  We learned SO much and had a great time together with our friends!

Happy Homeschooling,

Jamin

Sunday, March 13, 2011

Let's See If This Worked!

Well, hopefully after almost a year we have figured out how to get Feedburner to send out my posts from my NEW blog!  If this is finds it's way to your inbox it means I will be blogging on a regular basis again SOON!

Jamin